Friday, October 24, 2014

The joy of the home is love

I've been off-grid for a little while, visiting my grandmother, having a lovely time and collecting new stories and pictures.


Here's a little something I've been wanting to show you for a while. It is a small picture which has hung in my grandparents' house my whole life, and which reads 'The joy of the home is love'. That pretty much sums it up for my grandparents, who were always very loving towards each other. My grandfather would often ask my grandmother, "Are you in love today?" with a grin, sometimes followed by a little pat on the behind. That's how I want to grow old!


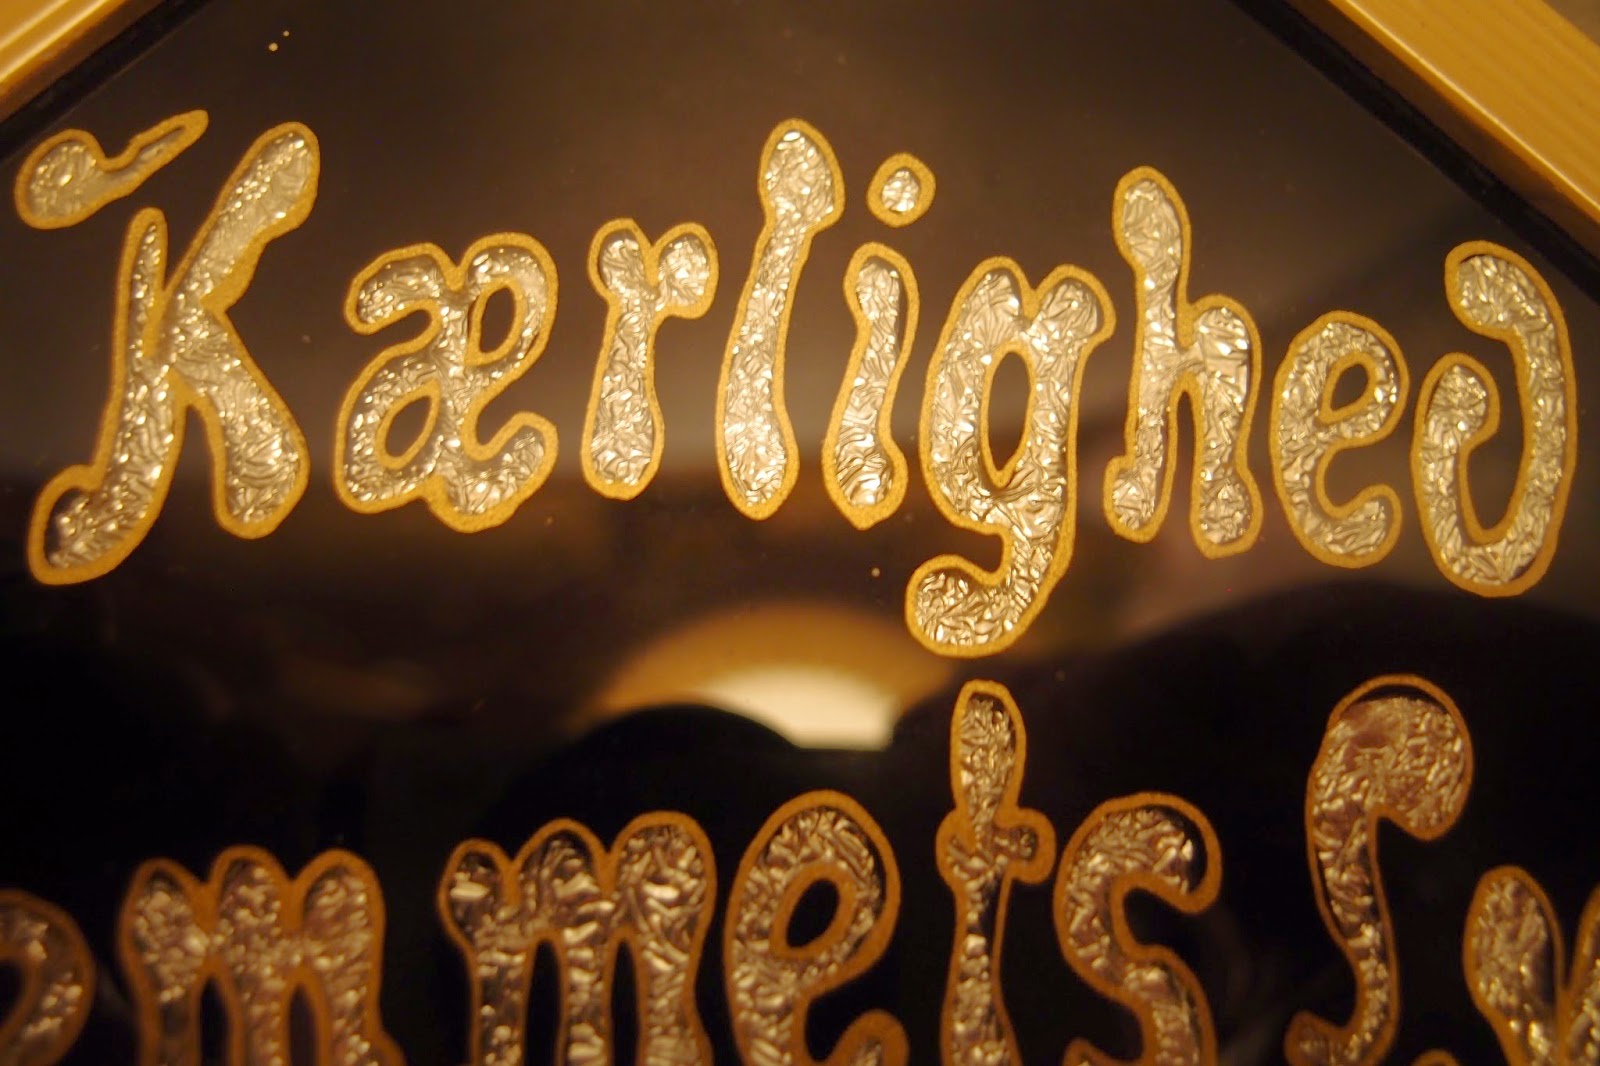
 My grandmother tells me that the picture must be at least a hundred years old. She remembers it hanging in her grandparents' house, and later in her parents' home, after which her mother passed it on to her.

It is made of glass, with the negative space painted black. The lettering and the flower were left clear, and edged with a thin gold line before tha black was added. Behind the glass is aluminum foil, slightly scrunched, which gives a more interesting result. I really love it - the message as well as the technique, which I must try sometime soon. I've been pondering some sort of modern take on the message, something like a tribute to the original, but I'm not yet sure how I want to do it.


Monday, October 6, 2014

Nalbinding with plant-dyed wool


This Saturday, we went to visit some friends who had a stall (and a real viking tent!) at a viking market, selling home-made nettle-cream, among other things. As we sat there on wooden stools outside their tent, drinking beer from drinking horns in the October sun, something caught my eye. Across the way, one of the stalls had many colors of yarn on display, so I went over to investigate. The yarn was plant-dyed, and the women who owned the stall were both doing nalbinding, or needlebinding, a technique which was used in the Viking age, before knitting and crochet. I've seen it a lot at Viking markets, and I had been wanting to try it for a while, so I bought four skeins of yarn and a wooden needle and was given a few words of advice, as well.


The red wool is dyed with madder, the pale green with birch leaves, the yellow with tansy and the purple with logwood.

When I got home, I found this great video by a nice Finnish woman explaining exactly how the technique works. This particular stitch is called the Mammen stitch, and was recommended to me by the women at the market for its strength and density. I've been trying it out, and this is what it's looking like so far, the first two rounds of a wristwarmer:


Friday, October 3, 2014

Waffle-blanket


What I really wanted to show you, though, was this 'new' blanket, which now lives in my aunt's couch, and which my cousins were so good as to photograph for me.

My mother and grandmother made it together when my mother was around 20 and still living at home. This was yet another blanket made from scraps left over by my grandmother, which, as my mother says, gives you an idea of how many things my grandmother actually knitted, producing scraps for at least three rather large blankets with many different colors!


The pattern is called waffle crochet, and as soon as my mother saw the pictures of the blanket, she remembered how it goes. That was lucky, because I was having a bit of trouble deciphering it, especially with all the color changes! But it's quite simple, really. Each row is made up entirely of double crochet (or treble) stitches. For the first two stitches in the pattern, you insert your hook into the top of the two double crochet stitches in the row below. These will be the ones that stick out towards the back. For the next two double crochet stitches, though, instead of inserting the hook into the tops of the stitches below, you go behind the column, if you will, of the double crochet stitch in the row below. These stitches will be the ones sticking out towards you.

Because of the color changes (two rows of each color), the waffle pattern really doesn't come out so clearly, but have a look at Suburban Jubilee: Waffle Crochet Tutorial - From Blankets to Dishcloths for a gorgeous example of the real waffle look!

The color changes make quite a nice look on the wrong side, as well, although the effect is somewhat less calming than on the right side. And again, I am loving the freshness of the color 'choices'. Since these scraps are all from projects of my grandmother's, you can imagine that future pics of her work won't be dull, either!


One more thing on texture


As I was taking notes for a new post, I looked at my mother's blanket on the couch beside me and
realized that two neighboring squares looked quite different. Somehow it doesn't come out so clearly in the picture, but in real life, they have different textures (which I only just noticed!). The blue square is made up of many small units with many relatively large holes, whereas the rust-colored square is more solid, and the holes make up a smaller part of the surface area. Because the yarn scraps she used were of different weight, they obviously resulted in different gauges. Instead of for example doubling the thin yarn so that it was more like the thick yarn, she repeated the pattern once or twice extra both in height and widht so that the size of the different squares were the same.

The effect is not very pronounced in this piece, and certainly wasn't meant to, but it made me think that this might also be a nice way to think up a scrap-blanket. It might give a very nice effect to specifically use yarns of different weight and accentuate the difference by crocheting squares of the exact same pattern, but with very different textures. In this picture, the pattern is repeated 6 times across, in 11 rows on the rust-colored square, whereas the blue has the pattern 7 times across, with 13 rows. This is quite a small difference, so it would be easy to make a more pronounced version.